- Posted on
- • Geiger Counters
My (First) Radiation Monitoring Station
- Author
-
-
- User
- Mr Blinky
- Posts by this author
- Posts by this author
-
Archived from radmon.org - originally posted 04/04/2016
I have finished up building/setting up my home radiation monitoring station and is all up and running. :cheer:
https://www.schmoozie.co.uk/radmon/ (currently offline.)
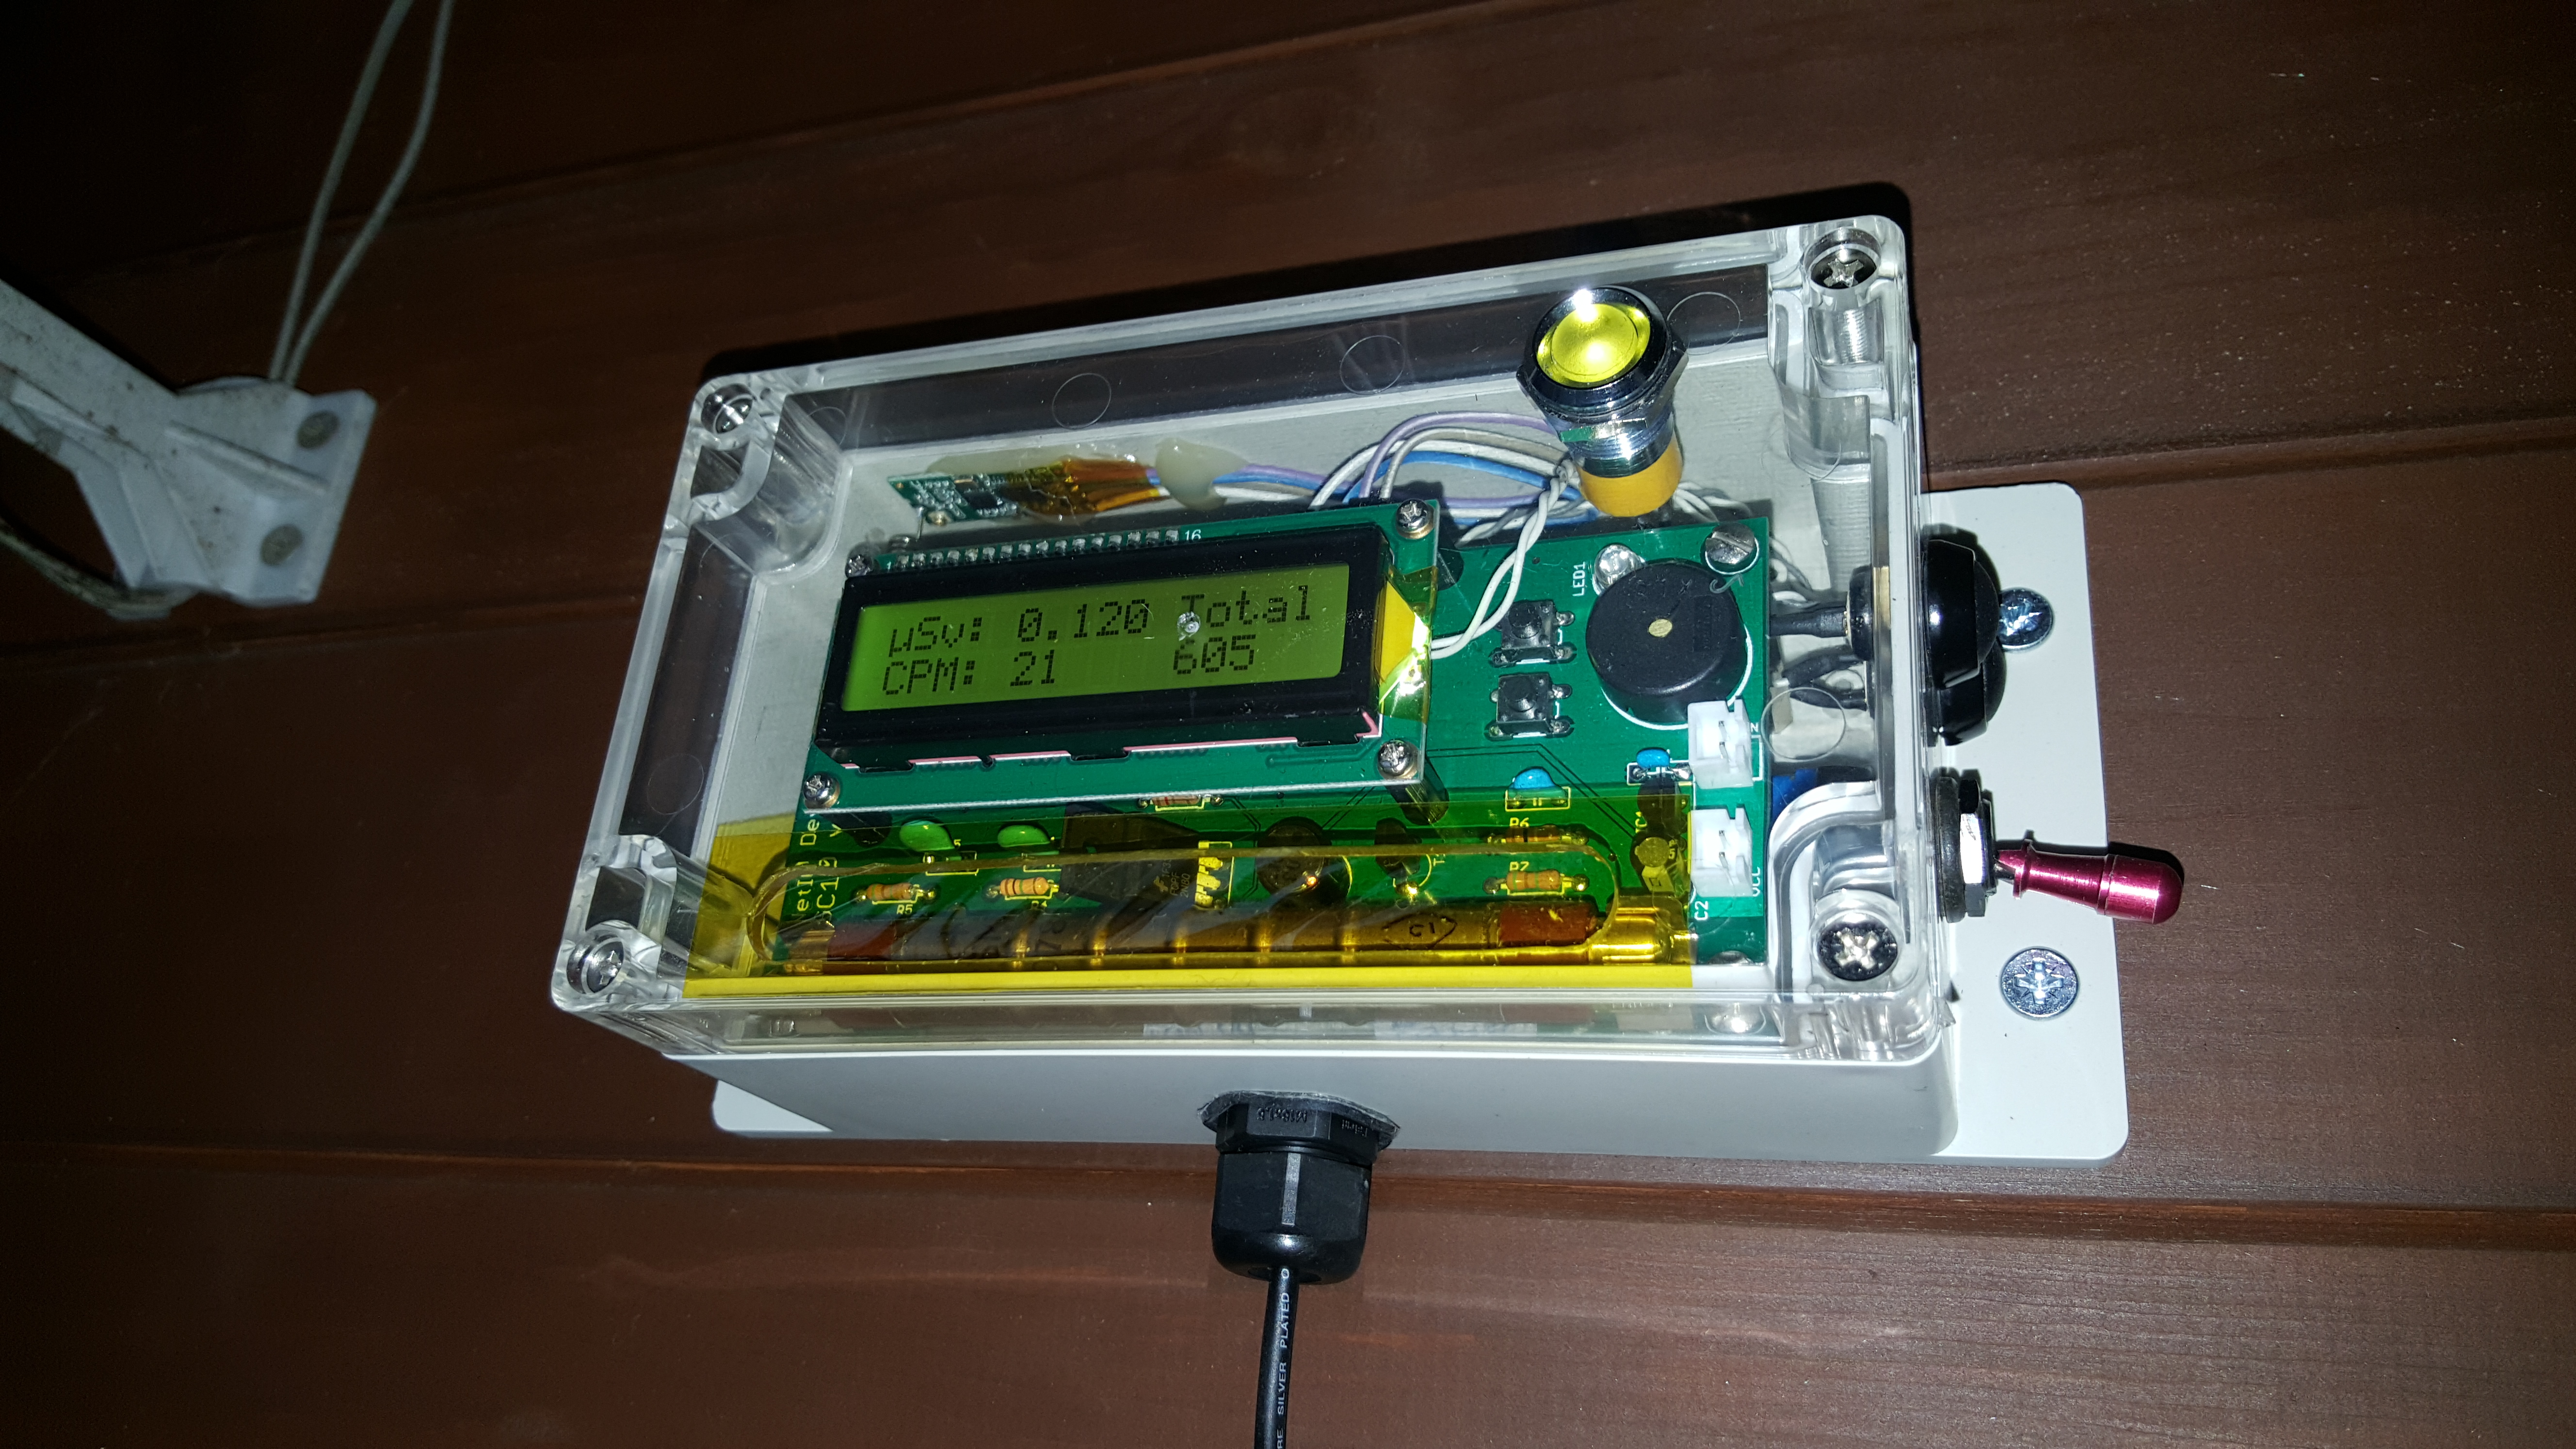
I won't go into too much detail as it is pretty much just a NetIO GC10, in an enclosure with a couple of buttons and switches added. It is mounted outside under a canopy on my workshop so rain is no issue and I have used all sealed switches/buttons etc with rubber gaskets on each to seal it up nicely. The window for the tube at the front is covered with some Kapton tape to seal that up also. Power is taken from a 5v PSU inside the workshop but here is the interesting thing, (for me anyway) the RS232 output is sent over wireless transceivers to my computer in the house at the other end of the garden. I'm pretty happy with it so far and the only thing I want to do to finish it is either paint it or cover in some kind of vinyl or similar to make it pretty.
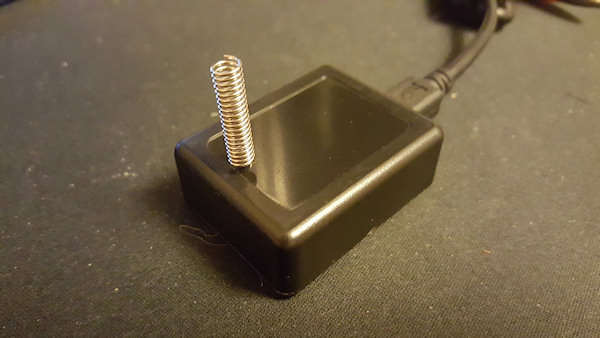
I used two HC11 RS232 transceivers, one connected to the GC10 and the other connected to a USB FTDI adapter (USB <> RS232 adapter). The transceivers work very well so far hardly missing a beat. They worked for me right out of the box with no additional configuration needed. Check them out at this link , but you can get them much cheaper on ebay. I paid £2.96 each including shipping for mine, so it was probably cheaper than buying actual cable to run the RS232 and saved all the hassle or running a cable etc.
This is the receiver that sits on my windowsill:
I put a bag of silica gel desiccant inside the enclosure to aid in keeping moisture at bay. I have done this for years whenever mounting any kind of enclosure outside and it works a treat, keeping everything dry and electrical contacts clean and shiny.
Some years ago I went through a period at work of designing and building custom switches/keypads for use in sauna, steam rooms and swimming pools. They were only basic with a couple of buttons on them but they were in very hostile (to electronics) environments. The circuits were potted and that kept the circuit happy and the switches/buttons were hermetically sealed. The case covers were all gasketed but this left the main connections to the 'elements' inside the enclosure. In testing these would last for weeks even months, but they would eventually fail. The failure mode was corrosion on the incoming cable terminals where it was connected to the circuit. At first The design was changed and a cable was soldered directly onto the board and potted in. This worked great provided the installers would install them correctly, but they didn't. Mainly they would cut down the cable, use a terminal block and just shove it behind the switch/keypad. Some even drilled a hole in the back of the enclosure and put the terminal block inside the enclosure pretty much leaving it to the elements.
I changed the design slightly so the cable was potted in and soldered to the board, like the last, but the cable was only 3" or so with a fairly robust connector. I added a bag of silica gel (as big as I could fit in the enclosure) and that pretty much solved the issues of the terminals/connectors corroding. I learned that no matter how much you think the enclosure is sealed, unless it is airtight, it will eventually pull in some moisture. This is down to the fact that as the enclosure and contents heat up the air expands and may push some out. Then it will cool down, the air inside cools and contracts, creating a very small vacuum in the enclosure. Air from outside with a higher moisture content will be sucked into the enclosure and with that happening every day the enclosure would eventually get enough moisture inside it would condense and corrode the contacts. This was in very harsh environments especially in steam rooms but the same will happen outside, it will just take much longer. I usually change silica gel bags in my stuff outside every year or so and that keeps them nice and happy.
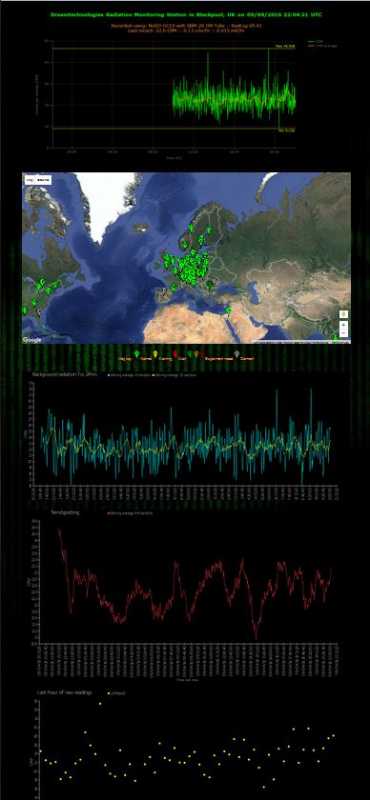
I have been playing about a bit trying to make my website 'radmon' page look nifty. I'm pretty pleased with the page so far.
I use radlog to transfer the locally generated graph to my website. I grab the european map from radlog.org in an iframe and then grab each of the six history/trend data images from radlog.org. Because I like a black background and use that on my page, the images right from radlog.org have white backgrounds and look poor, so I run them through a PHP image filter to change the colours negative, cache them locally and display on my page.